
Make pumpkins that will last FOREVER! The cutest Halloween accessory without all the mess.
Follow these instructions to make your very own Felt Pumpkins.

Here’s what you’ll need to get started –
PDF templates

Tools:
- Scissors
- Sewing needle
- Pins
- Long doll needle
Materials:
- 3 Felt Squares (2 for Pumpkin and 1 for stem and leaves)
- Toy stuffing
- 60″ Embroidery Thread (we used DMC stranded cotton)
- Pipe cleaner (optional for pumpkin curl)
CUT – Cut out 2 circles of felt

SEW – using approx. 1cm seam allowance sew together your 2 circles inside out (right sides together) leaving a small gap.

TIP – Always reverse at start and end of stitching.

STUFF – Turn through your circles and stuff with toy filling until nice and firm. Plump your pumpkin to keep it circular.

SEW – Seal up the hole in your pumpkin by hand sewing the gap closed with needle and thread. Use a ladder stitch or similar.

SEGMENTS – Next we’re going to give the pumpkin segments embroidery thread and a long doll needle approx 6″ long.

Thread your long needle with all 6 strands of embroidery thread and pierce your pumpkin right through the middle leaving along tail of thread approx. 5″ hanging out of the entry point.
Thread back through the pumpkin so that you have 2 tails and can tie a double knot tightly to create a dint in your circle, leaving one very long working tail of thread and one shorter.

Keep a tight hold on your thread as you now wrap over your pumpkin and pierce through the center over and over again until your have 8 segments.

The trick is to keep a tight hold whilst you are wrapping.


When you have your segments tie the 2 tail ends together in a double knot to hold it all together.
PLUMP your pumpkin and shape
STEM – Next we make the stem and leaves.

Take your rectangular stem piece and roll it up tightly.

Hand sew up the stem using a backstitch or similar to secure.

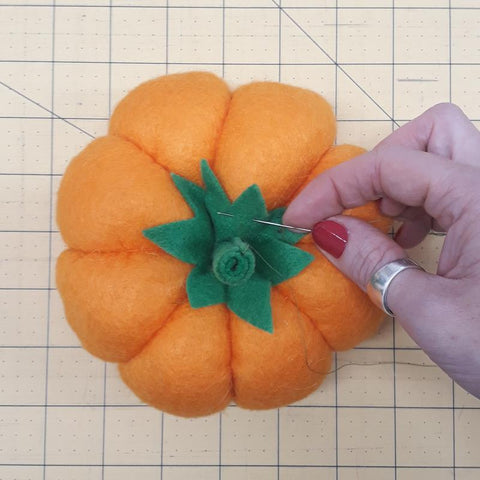
Next take your leaf shape and secure the stem onto it by hand sewing all the way around to join.

Poke the stem and leaves into the center of your pumpkin by delving into the center and securing with a stitch at each segment.

CURL – To make the pumpkin tendril wrap a pipe cleaner around a pencil to shape.

Then curl the pipe cleaner around your pumpkin stem to secure.
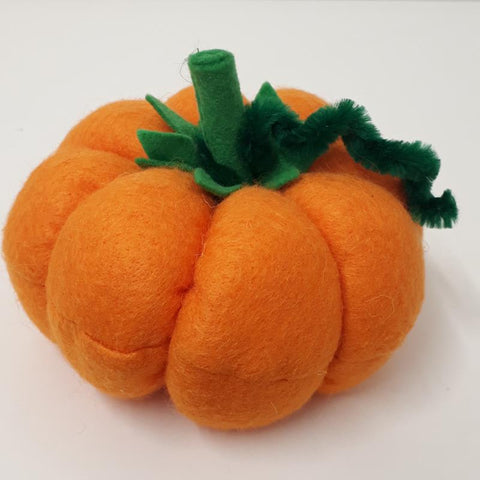
Et Voila! You have yourself a super cute pumpkin.
Play around with different colours and sizes just enlarge or reduce your templates.

I kept my samples traditional but you could easily add spooky felt eyes and a mouth.
I hope you had fun making this project. If you made on of these pumpkins please share with me on social media @frecklesandcocraft #feltpumpkins #frecklesandcocraft
Thanks for reading / Happy Sewing


