

As a keen doer and general busy bee I love making things that are both handy and useful.
This design came after a stint at a craft fair using a money belt, when it occurred to me that an ‘apron’ like this would be handy for so many different uses.
I adapted the details and size to make the pockets big enough for most tools, sewing, gardening, crafting, hairdressing and so on.
This tutorial is to support my pattern and sewing instructions

For this project you will need:
- Fabric 1 50cm (I used Studio G Village Life / Baking)
- Fabric 2 50cm ( I used Bear Essentials 3 Red)
- 2.5mm wide Cotton twill tape 2.5m
- Paper scissors
- Fabric scissors
- Pins
- Optional Sewing machine
Here’s how to make the tool belt
1 Pattern Templates
Cut out all sewing pattern templates with paper scissors and join with sticky tape where necessary. I have made sure that each template fits onto A4 so that you can print this pattern easily at home, but you will have to piece a few parts together before you can proceed.

2 Fabrics
Lay pattern templates onto your chosen fabrics and cut out main x2 and pocket x1 on the fold. Be aware of pattern direction for the best finish.

If you fancy a challenge choose a bold print and have some fun pattern matching the pocket and the main front.
3 Pocket
With right sides together, PIN and SEW your 2 pocket pieces together along the top edges.

PRESS seams open and fold out to reveal the right sides of the fabric.

TOP stitch 0.5cm seam allowance along top edges. If you can be neat, consider a contrasting coloured thread.
Shop materials from our sample here
The sewing machine that I used for this project is a Janome 230DC looking for a new machine take a look here.
4 Main tool belt
Lay your 2 MAIN pieces together with the pocket sandwiched in between and all bottom edges together.

Note: Fabric 1 of you pocket must be face up touching the lining of your MAIN piece as shown above.
SEW all the way around bottom and side edges, leaving top edges OPEN.
5 Seams
Cut seam allowance down and clip curved corners.


TURN through and PRESS
6 Pockets
Divide your pocket into 4 (or as many sections as you require) mark with pins and SEW through all layers to make pocket sections.

TOP TIP – Use a longer stitch length.


7 Tape
Fold the tape in half lengthways, center your tool belt and trap the open top edges into the tape. Use a long stitch length to SEW from one end of the tape to the other, trapping the tool belt in.
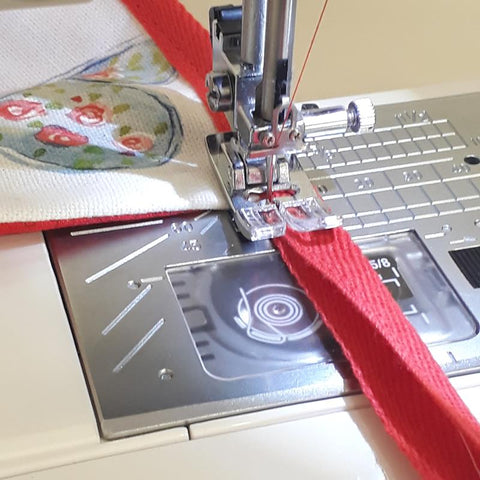
For neat ends, fold the raw end in when you start and finish the tape and reverse to secure.


And there you have it you are finished! Well done hopefully you are super pleased with your tool belt.

If you have tried this project I would love to see what fabrics you used.

(Sample above is made with Studio G Farmers Market)
The sewing machine that I used in this tutorial is a Janome 230DC I can highly recommend this machine for beginners and experts alike.
Happy Sewing


